
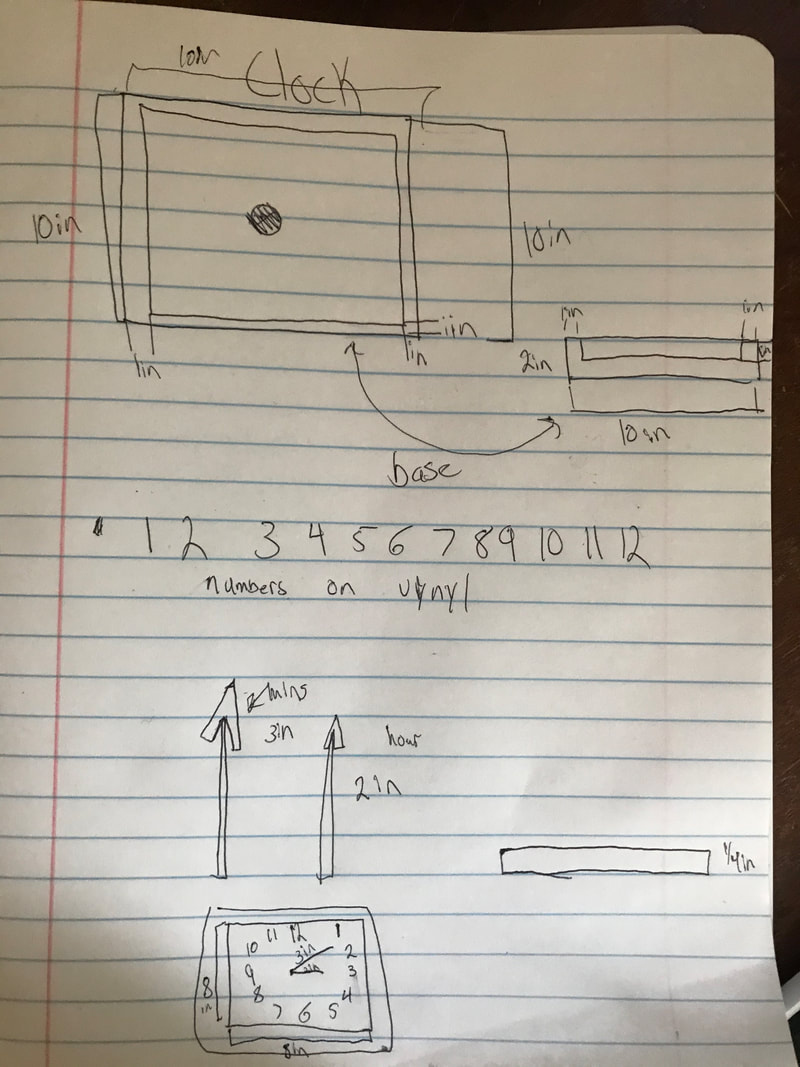
#1 This image is showing my planning out for what I'm going to do for each part of the clock. I broke the clock into 3 parts, numbers, arrows and body of the clock
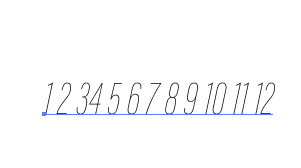
#2 Here are my clocks numbers in Illustrator. For this I plan on using the vinyl cutter machine to cut out each number, which I then place on the body of the clock when ready. I chose the vinyl cutter because I enjoined using it early this year and want to incorporate it into my final project.
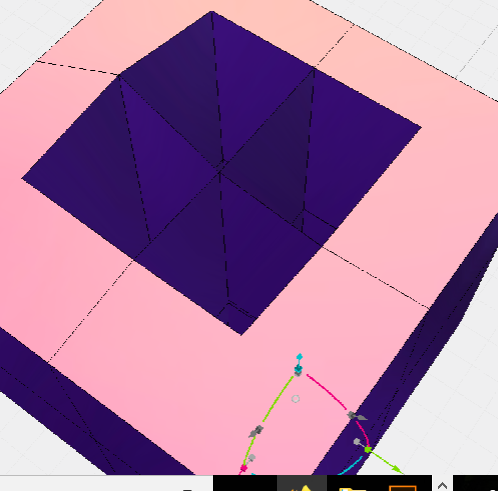
#3 This is the body of the clock. For this I used vectary.com, but if we were in school I would have used inventor because it's much easier to use. The machine I plan to use for making this part would be the CNC Router because it's very effective at cutting out and removing material, which is what I need to make the clock body. I would have it remove an 8in by 8in by 1in area.
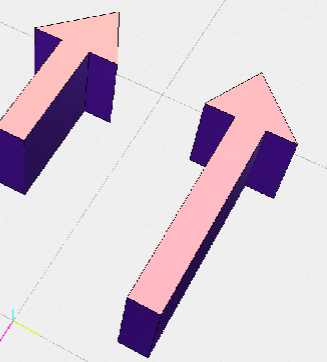
#4 These are the arrows of my clock, which I would use the 3d printer for. I would use the 3d printer because the arrows are the perfect size for the 3d printer to print off. I also chose the 3d printer because I didn't want the arrows to weigh much and 3d printed objects are quite light so I thought the 3d printer would work great.
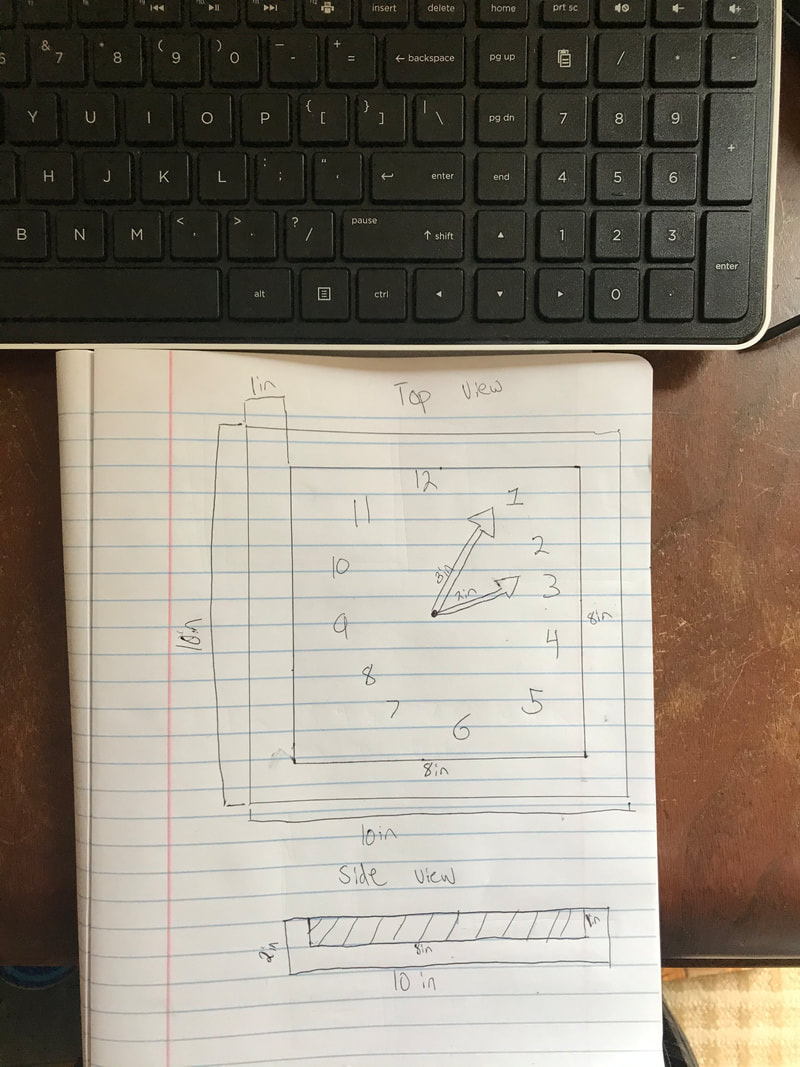
#5 This is a picture of my clock to just make a more visual explanation of what I'm thinking of. To put it into words, my clock would start off as a 10in-10in-2in piece of wood. I would then use the router to cut out an 8in-8in-1in area within the original piece of wood. That would make up the body of my clock and I would use the vinyl for numbers and 3d printed arrows for arrows.
Summary of time in lab:
Day one: Make all of my CAD drawings for the clock. (Arrows, Numbers, Clock Body) If there's time I'd get to 3d printing off my arrows.
Day two: First, if arrows aren't printed, print them. Then set up the router and make the body of my clock. If I finish that, then get started on printing off my vinyl numbers.
Day three: If vinyl needs to be done, finish that. Then I'd cut out the hole for the mechanism with a saw blade. Now I'd put in the mechanism, put on the numbers and finally finish by putting on the arrows.
#2 Here are my clocks numbers in Illustrator. For this I plan on using the vinyl cutter machine to cut out each number, which I then place on the body of the clock when ready. I chose the vinyl cutter because I enjoined using it early this year and want to incorporate it into my final project.
#3 This is the body of the clock. For this I used vectary.com, but if we were in school I would have used inventor because it's much easier to use. The machine I plan to use for making this part would be the CNC Router because it's very effective at cutting out and removing material, which is what I need to make the clock body. I would have it remove an 8in by 8in by 1in area.
#4 These are the arrows of my clock, which I would use the 3d printer for. I would use the 3d printer because the arrows are the perfect size for the 3d printer to print off. I also chose the 3d printer because I didn't want the arrows to weigh much and 3d printed objects are quite light so I thought the 3d printer would work great.
#5 This is a picture of my clock to just make a more visual explanation of what I'm thinking of. To put it into words, my clock would start off as a 10in-10in-2in piece of wood. I would then use the router to cut out an 8in-8in-1in area within the original piece of wood. That would make up the body of my clock and I would use the vinyl for numbers and 3d printed arrows for arrows.
Summary of time in lab:
Day one: Make all of my CAD drawings for the clock. (Arrows, Numbers, Clock Body) If there's time I'd get to 3d printing off my arrows.
Day two: First, if arrows aren't printed, print them. Then set up the router and make the body of my clock. If I finish that, then get started on printing off my vinyl numbers.
Day three: If vinyl needs to be done, finish that. Then I'd cut out the hole for the mechanism with a saw blade. Now I'd put in the mechanism, put on the numbers and finally finish by putting on the arrows.
